The Complete Ben Nevis Training Guide
I’ve written this Ben Nevis training guide for anyone who is thinking about climbing, is climbing or has-done-and-wants-to-do-it-again, Ben Nevis. As both a personal trainer and a bloke who has actually climbed the mountain (amongst many others), I’m in a good position to talk about what you need to be able to do in order to climb Ben Nevis.
This Ben Nevis training guide is long, but it’s complete. I cover fitness, nutrition, kit and recovery. Follow the advice contained here and you won’t go wrong, I promise.
If you didn’t already know, Ben Nevis is 4,413 feet high. It’s the highest peak in the UK and the walk from base to summit and back is 10.5 miles, which will be well over 20,000 steps.
Not only that, you’ll be doing those steps whilst carrying a bag full of food, water and appropriate health and safety clothing, so it’s not a case of walking up a hill – it’s walking up a hill whilst carrying a heavy bag on your back!
I’ve written this Ben Nevis training guide to help you all prepare for your trip. It’s long and it’s thorough, but Ben Nevis isn’t something to go into if you aren’t prepared. It can be dangerous if you don’t know what you’re doing and haven’t taken the time to prepare yourself.
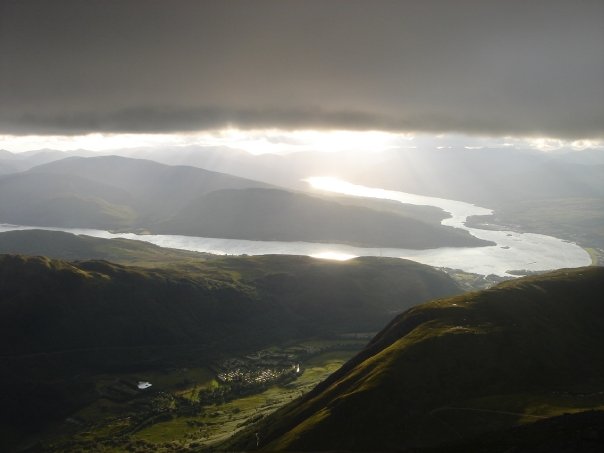
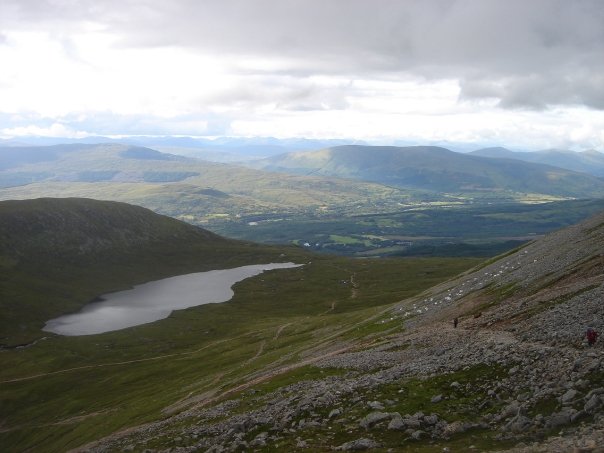
As hard as it is – the rewards are worth it. Check out the scenery on the climb…
Don’t be lazy and don’t train for it. If you aren’t prepared you’ll ruin your trip. If you’re doing a group trip it’ll be a bigger disaster because at least one person will have to look after you, so do yourself and your group a favour by giving it the respect it deserves and doing the correct training. If you think this is just a little stroll in the countryside, you’re wrong.
Ben Nevis Training Guide: Part 1 – Walking
This is an obvious one – start walking and do it often! Walking is fundamental to getting up a mountain, hence it being part one in my Ben Nevis training guide!
At this point it doesn’t even need to be long or steep, just get out and about. Walk to the shops, walk to work, walk the dog – just walk! You need to get your feet, ankles, calf muscles, Achilles and the muscles at the front of the shin (tibialis anterior) used to taking a lot of steps.
If you’ve got access to a treadmill, using that would be an ideal way to get the steps that you’ll need in. If you don’t and you’re interested in purchasing one, I advise you to do a lot of research on what to buy. This article on Peloton injury lawsuits says that a malfunctioning unit even caused the death of a 6-year old child.
Try to walk every day, aiming for at least 15,000 steps. If you need to play catch up at the weekends to hit your target, do so. You can’t take on a long walking challenge if you aren’t used to walking – you’ll be exhausted and in agony very quickly!
Ben Nevis Training Guide: Part 2 – Strength Workout
You have got to be fit when taking this on, but in particular you need a strong back, strong core and strong legs. They’ve got to be strong enough to walk a long way and your back and core need to be strong enough to carry your bag as well. You’ve also got to factor in that you’re walking up a steep hill for half of the walk – steep hills need strong bodies!
This workout is a basic starting workout and you should be looking to do this 2-4 times per week for the first month.
From then on, you will need to build on your fitness with other workouts. You can pick up my HIIT Workout eBook if you want any additional workouts. It’s only £3.99 and has 52 separate workouts in there. Just click the picture below and it’ll take you to the buying page on iBooks….
Ben Nevis Starting Workout
Treadmill
You’ve got two options here – walk or run. You can start with either.
Run– set the treadmill to a speed of anywhere between 6 and 12, then run for as long as you can. If you need to slow down for a walk every now and then, that’s fine, but try to run for as long as possible.
Walk– set the treadmill at an incline of 10 or above. Set the speed to 3-6, then walk as long as you can. Try not to stop at all.
Weight Training
Kettlebell Swings 4 x 12
This is for your legs, core and lower back…
Stiff Legged Deadlifts 4 x 10
Another exercise for your core, legs and back. This is a big exercise but very important for the walk.
Step Ups 2 x 25 (per side)
This is important for building the glutes (your bum!) These muscles will help power you up the mountain!
Push Ups 3 x 15
This is a standard exercise, helping with upper body strength and core strength.
Ben Nevis Training Guide: Part 3 – Practice Hill Walking
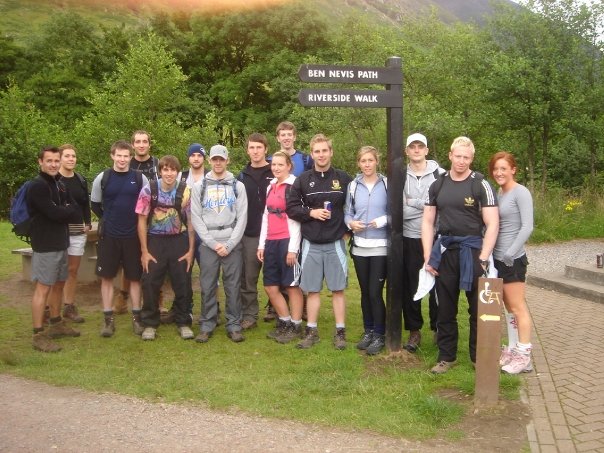
This is SUPER important – you need to practice mountain walking before you go to Ben Nevis. You need to walk up large hills/mountains as a collective at least 1-2 times before you go. There are a few reasons for this…
- It’ll teach you what walking up a mountain feels like
- You’ll learn to work as a group
- You’ll get to know how the walking feels and what to expect from the terrain
- The temperature changes will show you what to expect
- It’s a great way to break in your walking boots
- A practice walk is great training
- You’ll get to know what you need to take and what you can leave behind
In terms of locations, there are good training options in most parts of the country (although if you’re in the South East of the UK you’ll have to travel a fair bit!)
If you’re in the Midlands or North West, you should try to climb Snowdon. It’s a real test and is really like Ben Nevis. It’ll show you exactly what to expect when you travel up there – the paths and terrain are very similar. The only difference is the height! It’s as close as you can get to climbing Ben Nevis without going to Scotland though, so I’d urge you to try it.
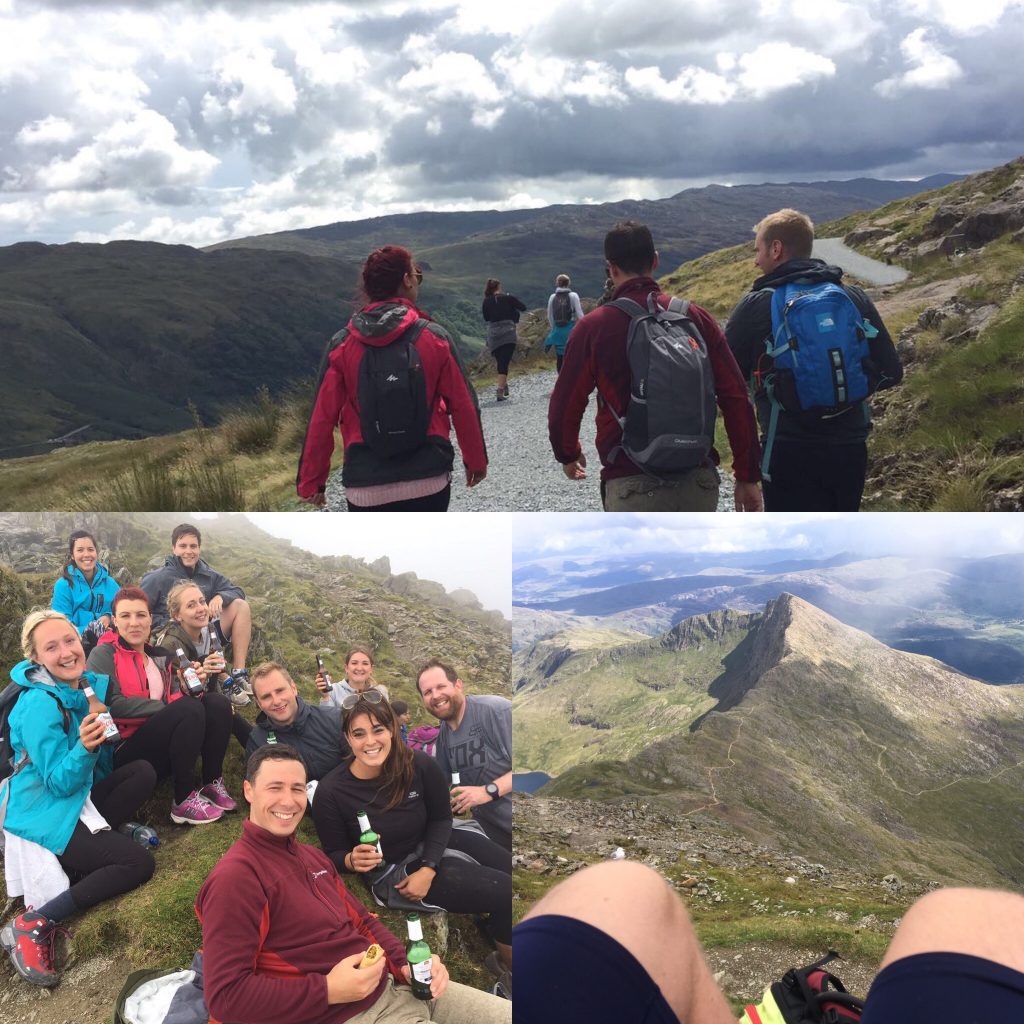
On Snowdon I suggest you go for the Miners Path, which has an easy start and then a harder climb, but it’s great prep for Ben Nevis.
The more times you can climb Snowdon, the better. It’s the best local (ish) prep you’ll be able to get and it serves as a great practice ground. In terms of difficulty and terrain it’s similar to Ben Nevis, plus you’re likely to get the same kind of weather conditions up there.
If Wales is a little too far for you, you could try Kinder Scout in the Peak District. It’s not too far from Manchester/Sheffield/Derby/Nottingham and isn’t very high, but it’ll give your legs a decent test. It’s 636m, so not much of a challenge to a relatively fit person. It’ll get you out of breath, but you’ll manage it.
If you live in the Lakes, you’ve got Scafell Pike. It’s a tough, relentless climb and there’s much more scree up there than the others, but it’s still great preparation for climbing Ben Nevis.
It’s smaller than Ben Nevis and Swindon at 978m, but the almost non-stop elevation of the climb means that it’s every bit as tough. At least with the other two there are flatter sections. With Scafell that’s not really an option – it’s climbing all the way!
The navigation is generally very easy and the weather conditions are just like Ben Nevis and Snowdon. It’s the best preparation in England for Ben Nevis, so if it’s your local mountain you’ve got an ideal practice ground ahead of climbing Ben Nevis.
Ben Nevis Training Guide: Part 4 – Nutrition
OK guys, a word of warning – I’m going to use clichés and management-speak in this. Forgive me. I’m only using them to get my point across. The Ben Nevis training guide just wouldn’t be complete if I didn’t talk about nutrition though – it can literally make or break your chances of getting up the mountain successfully.
I’m going to separate your nutrition strategy into 4 areas…
- Night Before
- Pre Walk
- During Walk
- Post Walk
They’ve each got their own requirements, as I’ll explain in the Ben Nevis Training Guide.
Night Before Walking…
The night before your walk, take 2 multivitamin tablets before bed. You’re going to sweat out a lot of minerals, so get plenty on board. We want to do as much as we can to prevent cramping.
Taking the minerals the night before will give them plenty of time to be absorbed into your system.
Pre Walk Nutrition…
Your pre-walk nutrition strategy is to fuel for the day ahead. We want high carbs (and the right mixture of carbs) at this point, alongside plenty of fluids.
You’ve got to control the elements you can. I understand that you if you are travelling you won’t always know what kind of breakfast you are going to have access to. In that case, make sure you are prepared regardless by taking your own. Here’s what I suggest…
Put 2-3 large mugs of dry oats and a handful of raisins into a Tupperware box. These are the dry ingredients.
Take a 500ml bottle of quality apple juice (Coppella is decent) and pour the apple juice over the oats and raisins so you just cover them. Leave it to soak for 10-15 minutes, stir and eat.
It’s super high carb, mostly slow-release carbs thanks to the oats but also the raisins and apple juice are simple carbs so will provide a quick energy boost.
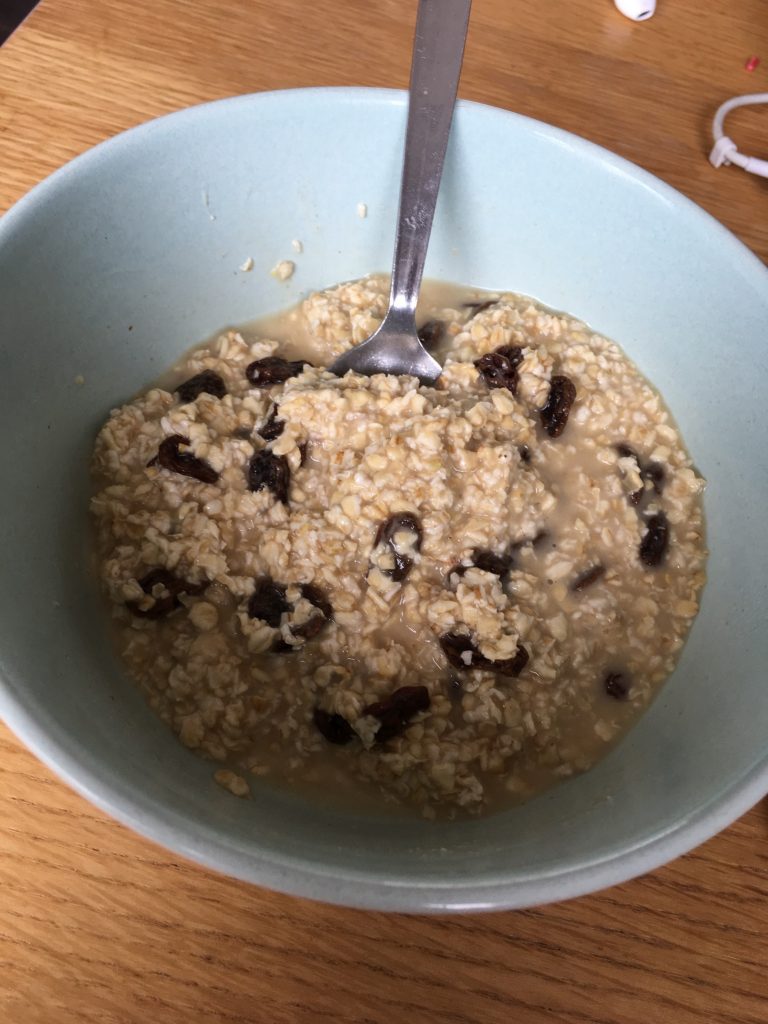
This is a doddle to travel with – the oats and raisins can be mixed at home and put in a Tupperware box. The apple juice can be taken in your bag.
Eat a banana or two with it and take another couple of multivitamins – extra energy and minerals.
Hydration: Start early and sip water throughout the morning – you don’t want to glug down 500-750mls just before you start your walk. Spread your water intake across 90 minutes or so, which means you’ll have time to hydrate fully and won’t have a load of water swishing around your stomach in one go.
- Start in the morning when you wake up.
- In the 90 minutes before the walk, aim for another 500ml.
- 15 minutes before the start of a walk, have a strong coffee (add sugar if you like – you’ll be burning it!)
Mid Walk Nutrition
The mistake a lot of people make is they cram in energy gel after gel during the walk. That’s fine, but you’re unlikely to run out of fuel too soon. Your body will be well trained to use fat as a back up fuel, so we use carbs as a primary fuel.
There’s a place for gels, but not too soon and not too frequently.
During the walk, ESPECIALLY if the weather is hot I’d be looking for you to replenish salts as a priority.
Electrolyte drinks (like Lucozade) are OK, but given the nature of your event I’d want a higher salt content. Something like salted peanuts or crisps would be perfect – high salt content and decent calorie numbers. They’re also easy to carry because they come in a small, watertight bag.
I’d look for you to take on one of these bags of crisps/nuts roughly every 60-90 minutes depending on how much you are sweating. More sweat = more frequent salt intake.
If you’d like to take sugar on as well at the same time, go ahead – just don’t rely on sugary foods solely because they are essentially almost pure sugar and fat, but unlikely to replenish sodium, potassium, magnesium and chloride.
Especially important is the replenishment of salts even when you feel fine – you’ll be in an environment where you’ll be getting colder the higher you go, so your body temperature will be reduced. Don’t be fooled by this, you’re still using minerals during the muscle contraction so sweating isn’t your only method of mineral use.
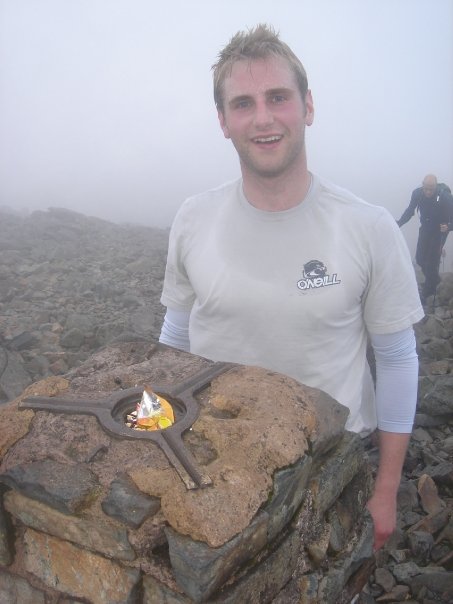
Additionally, if there’s rain or thick fog you’ll be washing the sweat off your skin so may not be aware of the real amount you’re sweating. Check out the picture below for an idea of the fog – this was taken at the top of Scafell Pike a few years ago. So much water means your sweat washes away!
IMPORTANT POINT!
Sports nutrition is different from day to day nutrition. A simple rule to live by in sports nutrition is this…
EAT FOR WHAT’S AHEAD OF YOU, NOT FOR WHAT YOU’VE DONE
If you get to a point in the walk where your energy crashes, it’s too late – your performance is compromised beyond reasonable repair. Your strategy should be to fuel your way through the event, not try to replace lost energy part way round.
Think of food intake as little and often as you go – don’t miss a food break and binge when you hit the next one because it’ll see blood diverted to the digestive tract and your energy will be crashing before you know it. Remember, you want small food intakes at every available point.
Post Walk Nutrition
If you’ve fuelled correctly, you won’t need to replace lost carbs – you would have over-consumed carbs during the morning and throughout the walk to keep you fuelled.
Instead, you should be looking at damage repair because all of the walking etc will have taken it out of your body – there’ll be muscle damage, connective tissue damage and possibly a little bone damage (it sounds dramatic, but it’s not dangerous damage, it just needs a little repair and recovery).
Base your post-walk nutrition around a high protein intake from a good quality source such as meat, fish, eggs etc. Additionally, you want to consume a lot of vegetables for the vitamin and mineral benefits. I’d also supplement before bed with a multivitamin and a good ZMA (zinc and magnesium) tablet.
Rehydrate a lot – water first! (Then booze!)
Sleep as long and as deeply as you can and if you have access to one, jump in a sauna. Stimulate circulation and blood flow and kick-start recovery.
Ben Nevis Training Guide: Part 5 – Health and Safety
A lot of this advice may be common sense, but it’s important to say anyway!
- You’re walking up a mountain, not a nice, smooth track. You’re going to have uneven track underfoot and there will be loose stones. There may be a lot of water coming down off the mountain, there could be snow and ice to deal with as well. With that in mind you really need to be wearing good quality, well-fitting walking boots. Approach shoes, trail shoes and fell shoes just won’t be suitable.
- At least two members of your team should be competent map readers. It’s unlikely you’ll get lost (the path is very clear), but in case of thick fog/accidental wrong turns, having someone who can read a map is a good idea.
- The temperature differences between the base and the summit can be vast, so you have to prepare for that. My suggestion is your wear layers that you can take off/put on as and when your temperature changes. When I last climbed Ben Nevis (in June) it was 16 degrees at the bottom and -4 at the top.
- Make your top later a thin waterproof one – you don’t need a thick waterproof jacket because your insulation will come from the layers. If it’s raining but you’re hot, a thin waterproof is better than a thick one.
- Take a first aid kit – sounds obvious, but you must prepare. Check it’s well stocked too!
- Stick together as a group. The track is well marked, but there is little/no phone signal up high so if you become split, you’ll have real difficulties communicating if something happens.
- Make sure you’ve worn your hiking boots in beforehand. Do at least 4-5 long walks in them before the Ben Nevis trip. You don’t want to find out the hard way that your boots are too stiff.
- Wear good socks. If you wear cheap socks they’ll rub away. A coupe of pairs of high quality sports socks should do you well.
- Take a torch and some high-vis jackets. You probably won’t need it, but it’s a good idea just in case.
Follow this advice and you’ll be golden.
Ben Nevis Training Guide: Part 6 – The Packing List
Here’s a list of what you’ll need to take with you onto the mountain. This is the basic list, but feel free to add to it if you need to.
- Layers – base layers, light t-shirts, shorts/leggings, tracksuit bottoms, breathable waterproofs, waterproof jacket.
- Peripheral warmers – spare socks, gloves, a hat.
- First aid kit.
- Torch and batteries.
- OS Map.
- Food and water (plus spares).
- Walking boots.
- Emergency insulation jacket.
- Rucksack
- Phone (make sure it’s fully charged)
Ben Nevis Training Guide: Concluded
I know there’s a lot in this Ben Nevis training guide, but if you follow it you’ll be strong, fit and ready to go. You will enjoy the climb rather than suffer your way through it!
The scenery is incredible, the pubs afterwards are great fun and it’s a real achievement. It’s nearly 4,500 feet of climbing, so it burns a LOT of calories and is a great thing to look back on. If you’re healthy and prepared for it, these physical challenges are great fun! If you’re not fit and prepared, they’re horrible! Make sure you’re in the fit group.
If you’ve got any questions, just give me a shout.